The robotic vacuums by Roomba have made our daily lives so much simpler. No matter how busy your schedule is, you will not have to compromise on the tidiness of your home. Instead, your trusty robotic friend will do the cleaning for you. In contrast, you can attend to your other chores in your home or even outside of it.
Roomba cleaners are pretty powerful. But that doesn't mean they don't need cleaning and maintenance.
Unfortunately, we neglect this fact and end up damaging our trusty companion. Therefore, we will help you clean Roomba brushes without much effort in this guide. The goal is to make them work like a charm once again.
So, let's begin with the step-by-step cleaning guide.
How Do You Clean Roomba Brushes?

So, how to clean Roomba brushes? Roomba vacuum cleaners come with a couple of brushes. There is a main brush roller and a side brush.
Most of us tend to neglect these Roomba brushes, and they get dirtier with time. It results in low cleaning effectiveness of the cleaner. iRobot recommends cleaning these bulrushes once a week if you use your iRobot Roomba daily and twice a week if you have pets.
Why clean Roomba brushes?
With time, hair, dust, and various other harmful contaminants gather and build up right around the Roomba's brushes and other parts. It happens each time the cleaner goes out to do its job. Therefore, you need to clean these Roomba brushes regularly to ensure your cleaner lasts for long. It's just a tiny bit of maintenance from your side that will go a long way.
What tools are required?
- Standard Phillips screwdriver
- A piece of microfiber cloth
- A pair of rubber gloves
- Some alcohol wipes
- A can of compressed air
The Process
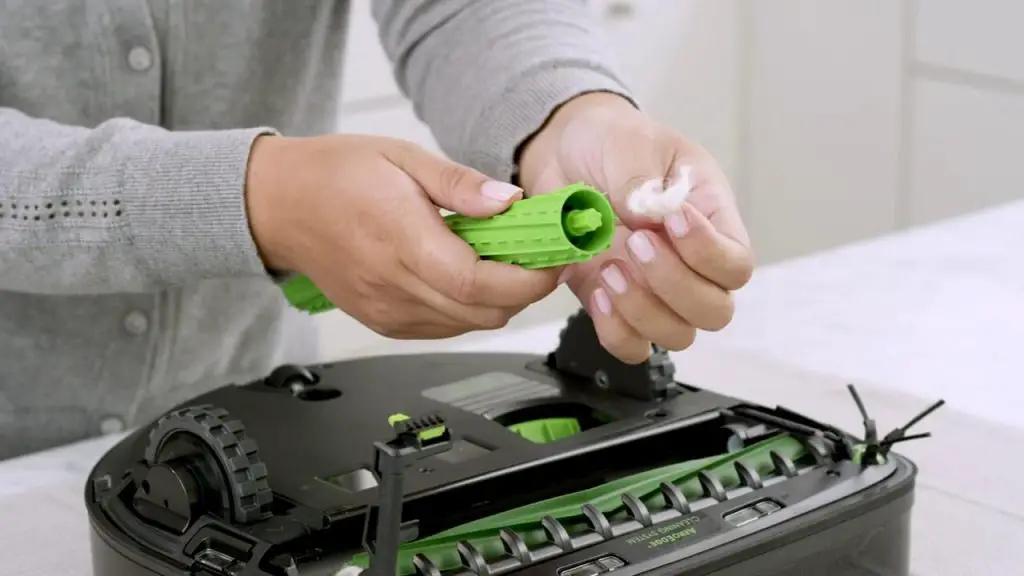
You have to begin the cleaning process by working on the side brush. When you don't clean it quickly, it will stop spinning. But the good thing is cleaning this side brush is not that complicated.
Different robot vacuums in the Roomba Series have different side brush styles and designs. But the cleaning process of these side brushes is the same from Roomba 500 to Roomba 900.
- First, you have to remove the side brush by turning your cleaner upside down. For taking this Roomba brush off, you will need your screwdriver. You can also use a small coin to remove that brush screw.
- Now, it's time to clean the side brush model. But, first, you will have to clean the Roomba brush and the post because the hair is often found right underneath the brush.
- When you are done, just put the Roomba brush back into its place and tighten the screw. Your brush is all clean now.
The next step is to clean the brush roller. This second brush has a slightly older Roomba 400 to Roomba 700 Series design. And there is a brush guard present. The newer models include Roomba "i" and "s" Series, 800, and 900 Series. Again, a brush roller gets tangled less and has brush frames. These frames function just like a brush guard from the older models.
Just like the side brush, hair and dust can get stuck into this brush and hinder its motion. Newer models also have much sturdier rubber brushes. These rubber brushes are much more durable than their predecessors, so these rubber brushes offer good value for money. So, here are the steps you need to follow.
Cleaning the main brush in Roomba 400 to 700 Series

- The first step is to turn your Roomba upside down and remove the brush guard. You can do that by pushing both those yellow tabs.
- Once this brush guard is open, remove the bristle brush and the beater brush from the brush module.
- Remove the brush bearings from the side brush module and clean them thoroughly.
- You can use the cleaning tool that comes with your Roomba and remove the hair from that bristle brush. Do this by pulling the tool right over the brush.
- Once you have cleaned the bristle brush, put the bearings back into their place.
- Both the Roomba side brush and the main brush are back in their place. You can close the brush guard and press to snap it back into its place with light pressure.
Cleaning brush roller (Series 800, 900, "i", "e", “s”)

- You can begin by turning your cleaner upside down and opening that brush guard or frame by pushing down the tab.
- Once you have opened the door, you can remove the side brush and brush roller.
- Remove any hair or debris from the hex and square pegs present at the end of the Roomba's brushes.
- Once you have cleaned the ends, remove those gray brush bearings and clean within and around them.
- Once those bearings are clean, it's time for the green shaft of the side brush and the main brush.
- Now, reinstall everything back, starting from the bearings and the brush guard. After that, reinstall the two brushes, the side brush, and the second brush, and make sure that the bearings are in their appropriate place.
- Press gently on the brush frame release tab to ensure the assembly is back in its place.
Roomba Clean Main Brushes Error
Roomba is a robotic cleaner; it will know when to clean your brushes. It is a convenient feature that will alert you when to clean those Roomba brushes. The error code that that cleaner will show is 2, and your cleaner will beep twice.
It will indicate that you will have to clean the side and main brush. It is not as if you have to clean the side brush, only the main brush. You have to clean the main and the side brush thoroughly. Otherwise, the cleaner will keep beeping.
Hair is stuck in and on the brushes if you continuously get the error. And it only occurs if you are not cleaning your main and side brush regularly. When hairs get stuck, they prevent the brush movement or spinning.
You can follow the steps listed above and get hairs from the side and main brush. Just make sure that everything you disassembled is back in its place before turning your Roomba back on.
And as soon as you turn it back on, you will notice that it is not beeping anymore. It means that you have resolved the problem, and it's time for you to carry on setting the schedule and let the cleaner do its job.
How Do I Clean Roomba's Brush Cage?

Cleaning the brush cage of your Roomba cleaner is pretty simple. The cage is within which the main brush is present and not the side brush. If you are doing it for the first time, it's better to follow the instructions provided in the user manual. Follow the steps there to remove the cage from the cleaner. There are instructions given in the manual on cleaning the cage out.
It is best to use cotton cloth or microfiber cloth to eliminate all the hair and filth from the cage. It is essential to clean the cage because any hair stuck will get back to the brush once you start rerunning your cleaner. Therefore, the entire cleaning job of your rushes, as illustrated above, will go in vain.
Hence, you must clean out the cage fortnightly to make sure your brush remains clean for a more extended period. But even then, you will have to keep an eye on your brushes and clean them weekly to be sure.
Can You Wash Roomba Brushes?
You can wash the brushes using mild dishwasher soap and warm water. You can even clean the filters that are present inside the cleaner. But you have to make sure that the brushes and filters or any other parts you have washed go back inside the cleaner only when they are completely dry.
If you put wet parts into your Roomba unit, the moisture from them will ruin your unit once and for all. So, make sure not to go for this mistake and ensure that you only assemble your cleaner when the parts are fully dried. Also, make sure you don't use harsh chemicals to wash these parts. Otherwise, the machine's lifespan will become shorter.
How Often Should You Replace Roomba Brushes?

First of all, you have to make sure that your Roomba brushes are clean. And for that, if your cleaner does clean daily, you will have to clean the brushes once every week. And if you have pets in your home, you will have to do it twice a week.
This practice will significantly increase the overall life of your Roomba cleaner. But you are not done here. iRobot recommends that you replace your brushes every six to twelve months. It is to make sure that your Roomba is working at its best and to your satisfaction.
The brushes can last up to a year if you take proper care of them. Otherwise, they will only last for a couple of months, and you will have to bear some extra costs.
Wrap-Up
And that's all about how to clean Roomba brushes. Roomba is a pretty finance cleaning machine. But you need to take proper care. We forget that this little root cleaner also needs our care and attention in most cases. And with minimal effort, we can significantly increase its overall lifespan. It can make the vacuum last for a long time to come to get the best value for money.
Brushes are mostly ignored, so you need to take proper care of them. Otherwise, you will have to keep replacing them quite frequently. So, to get the best bang on your buck, make sure that you show your robotic friend some love and take good care of it.